05/27/2025
DIY Roofing: How to Measure a Roof for Shingles

Tackling a DIY roofing project can be both rewarding and cost-effective, but accuracy in measurement is the foundation of success. Whether you’re planning to replace worn-out shingles or install a completely new roof, knowing exactly how much material you’ll need is critical to your project’s success and budget. Incorrect measurements can lead to costly overages or frustrating shortages that delay your project.
In this comprehensive guide, we’ll walk you through the precise steps to measure your roof for shingles, from basic calculations to accounting for waste factors. By the end, you’ll have the confidence to accurately determine your roofing material needs and be well-prepared for your DIY roofing project. Let’s get started with the essential skills that will set you up for success in your shingle replacement journey.
Why Accurate Roof Measurements Are Critical for Your Project
Accurate roof measurements form the foundation of any successful roofing project. When you’re planning DIY roofing work, precision isn’t just helpful, it’s essential for several key reasons.
First and foremost, accurate measurements directly impact your budget. Overestimating materials leads to unnecessary expenses and wasted materials, while underestimating results in frustrating mid-project delays and potentially higher costs due to rush orders or multiple deliveries. According to a 2024 industry report, measurement errors account for approximately 15% of budget overruns in DIY roofing projects.
Beyond the financial implications, accurate measurements ensure you purchase the right amount of materials to complete your project efficiently. Running short of shingles mid-installation can be particularly problematic, as new batches may have slight color variations from your original purchase, potentially creating visible patchwork on your finished roof.
Precise measurements also help you properly plan your project timeline. When you know exactly how much material you need, you can better estimate the time required for installation and coordinate other aspects of your project accordingly.
The difference between a successful DIY roofing project and a costly headache often comes down to the accuracy of your initial measurements.
Additionally, when discussing your project with roofing contractors in Dallas TX, having accurate measurements demonstrates your preparedness and helps ensure you receive accurate quotes if you decide to consult professionals for portions of the work.
Essential Tools and Safety Equipment for Roof Measuring
Must-Have Measurement Tools
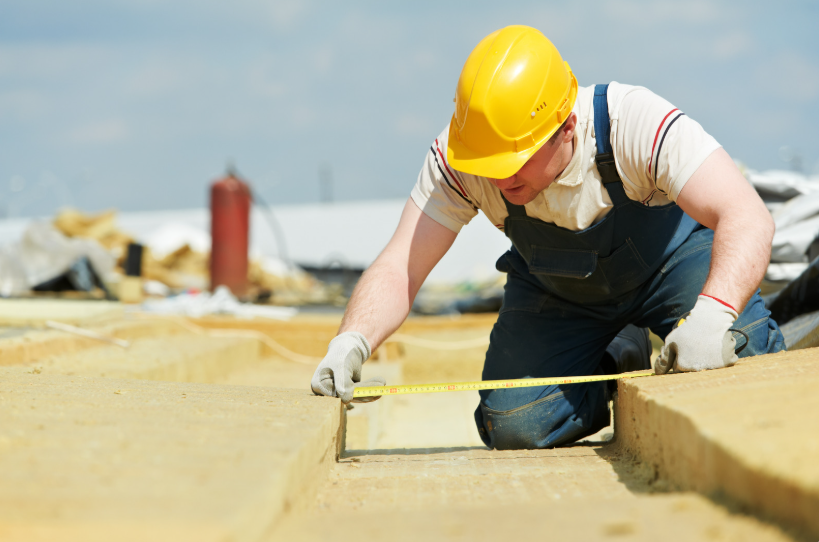
Before climbing onto your roof, gather the proper tools to ensure accurate measurements. A 25-foot tape measure is essential for basic length measurements, while a longer 100-foot tape measure helps with larger roof sections. For enhanced accuracy, consider a laser measure, which can provide precise readings without stretching tape across dangerous spans.
A roofing square or speed square helps identify and measure angles, particularly important when calculating roof pitch. A pitch gauge is another specialized tool that simplifies the process of determining your roof’s slope. For documenting your measurements, bring a notepad and pencil or use a smartphone app designed for construction measurements.
For complex roofs, consider bringing a digital camera or smartphone to photograph different sections, which can help you verify measurements later and identify challenging areas. Some roofing professionals also recommend a simple calculator for on-the-spot calculations, though most measurement work can be completed on the ground after gathering the raw numbers.
Safety Precautions Before Climbing
Safety must be your top priority when measuring a roof. Falls account for the majority of serious injuries in DIY roofing projects, with the National Safety Council reporting that ladder-related incidents alone cause over 300 fatalities annually in the United States.
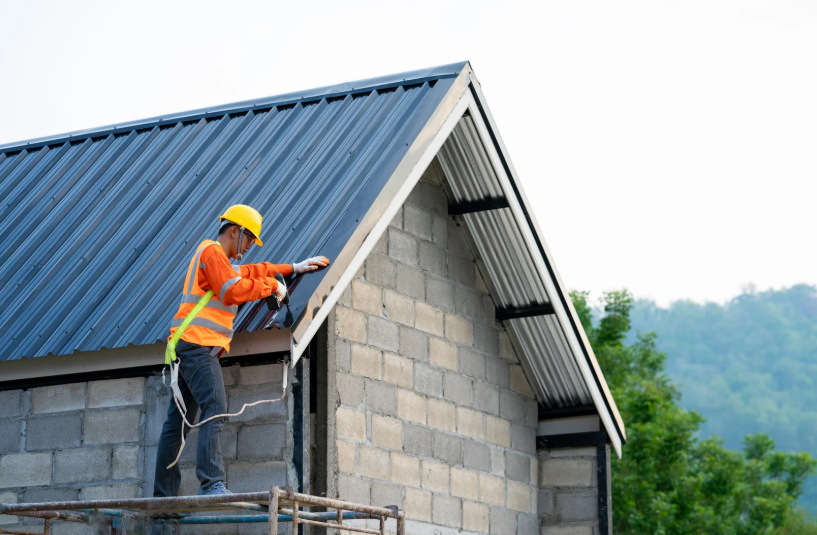
Start with proper footwear. Rubber-soled shoes with good traction are essential. Never measure a roof in wet, icy, or windy conditions. A safety harness connected to a secure anchor point is strongly recommended, especially for steeper roofs. Always use a sturdy extension ladder that extends at least three feet above the roof edge, and secure it properly before climbing.
Work with a partner whenever possible. Having someone to hold the ladder and assist with measurements not only improves accuracy but provides crucial safety backup. If you’re uncomfortable with heights or your roof has a steep pitch, consider alternative measurement methods like those offered by professional residential roof inspection services in Fort Worth TX.
Remember to check weather forecasts before planning your measurement day, and never rush the process. Taking an extra hour to measure safely is always preferable to risking injury.
Understanding Roof Geometry and Terminology
Common Roof Styles and Their Measurement Challenges
Different roof styles present unique measurement challenges. The simplest is the gable roof, with two sloping sides meeting at a central ridge. These roofs are relatively straightforward to measure, requiring calculations for just two rectangular planes.
Hip roofs, which slope on all four sides, require more complex measurements as you’ll need to account for triangular planes meeting at the ridge. Mansard roofs, with their double slopes on each side, demand even more detailed measurements to account for the change in pitch.
Gambrel roofs (commonly seen on barns) have two different slopes on each side of the ridge, requiring separate measurements for each section. Complex designs with multiple dormers, valleys, or turrets require breaking down the roof into manageable sections and measuring each independently.
Understanding your specific roof style is crucial before beginning measurements. Each architectural design requires slightly different approaches:
For flat roofs, measurements are straightforward square footage calculations, though you’ll still need to account for slight slopes for drainage.
For complex roofs with multiple planes, roofing contractors in Arlington TX recommend creating a simple diagram and labeling each section before measuring, which helps organize your work and ensures no areas are overlooked.
Dormers, skylights, chimneys, and other protrusions must be measured separately and subtracted from your total area calculations, though you’ll still need shingles for flashing and weatherproofing around these features.
Step-by-Step Roof Measurement Process
Measuring Simple Gable Roofs
For a basic gable roof, start by measuring the length and width of each rectangular plane. From the ground, measure the length of your house (including overhangs) and the width from the eave to the ridge. If you can safely access the roof, measure directly on the roof surface for the most accurate dimensions.
To calculate the roof area, multiply the length by the width for each plane, then add the areas together. Remember that measuring on the roof surface (rather than from the ground) accounts for the actual area that needs to be covered with shingles.
For example, if one roof plane measures 30 feet long by 15 feet wide, the area would be 450 square feet. With two identical planes on a simple gable roof, your total roof area would be 900 square feet.
Don’t forget to account for overhangs, which typically extend 6-12 inches beyond the exterior walls. These areas require shingles and should be included in your measurements.
Tackling Complex Roof Designs with Multiple Planes
Complex roofs require a systematic approach. Start by creating a simple sketch of your roof from above, dividing it into manageable sections such as rectangles, triangles, and trapezoids. Number each section to keep track of your measurements.
For each section, measure the length and width or base and height, depending on the shape. For triangular sections (like those found on hip roofs), measure the base and height, then multiply them together and divide by two to find the area.
When measuring valleys and ridges, be sure to account for the additional materials needed for these areas. Valleys typically require special treatment with additional underlayment and flashing, while ridges need specific cap shingles.
For homes with dormers or other projections, measure these separately and add them to your total. Remember that complex intersections between roof planes often require more material due to cutting and fitting shingles around these areas.
If your roof has multiple levels or sections with different pitches, commercial roof inspection specialists recommend measuring each distinct section independently, then combining the results for your total roof area.
How to Measure and Calculate Roof Pitch
Roof pitch is expressed as a ratio of vertical rise to horizontal run, typically with run standardized at 12 inches. For example, a 6/12 pitch means the roof rises 6 inches for every 12 inches of horizontal distance.
To measure pitch from inside the attic, place a level horizontally against a rafter. Measure 12 inches along the level from the rafter, then measure the vertical distance from this point to the rafter. This vertical measurement gives you the rise in your pitch ratio.
From the roof itself, you can use a dedicated pitch gauge for the most accurate reading. Alternatively, place a level horizontally against the roof surface and measure as described above.
Knowing your roof’s pitch is crucial because it affects the actual surface area compared to the horizontal footprint of your house. Steeper roofs have more surface area to cover with shingles. To convert your horizontal measurements to actual roof area, you’ll need to apply a multiplier based on your roof pitch:
- For a 4/12 pitch, multiply by 1.054
- For a 6/12 pitch, multiply by 1.118
- For an 8/12 pitch, multiply by 1.202
- For a 12/12 pitch, multiply by 1.414
This calculation gives you the actual roof surface area that requires shingles.
Converting Measurements to Shingle Quantities
Understanding Roofing Squares and Bundles
Once you’ve calculated your total roof area in square feet, you’ll need to convert this to “squares,” the standard unit for purchasing roofing materials. One roofing square equals 100 square feet of roof area.
To determine how many squares you need, divide your total roof area by 100. For example, if your roof measures 2,400 square feet, you’ll need 24 squares of shingles.
Shingles are typically sold in bundles, with three bundles usually covering one square. Therefore, for 24 squares, you would need approximately 72 bundles. However, this can vary by manufacturer and shingle type. Architectural or premium shingles may require more bundles per square due to their thickness and weight.
When purchasing materials, check the manufacturer’s specifications for the exact coverage per bundle. Some specialty shingles may require four or more bundles to cover a single square. Roofing contractors in Bedford TX recommend always verifying this information before making your purchase.
Calculating the Waste Factor for Your Project
No roofing project proceeds without some material waste, so it’s essential to account for this in your calculations. Industry standards suggest adding a waste factor of 10-15% for a simple gable roof and 15-20% for more complex designs with multiple intersections, valleys, or dormers.
Several factors influence your specific waste factor:
- Roof complexity: More valleys, dormers, and intersections mean more cutting and fitting, resulting in more waste.
- Shingle type: Some shingles, particularly architectural styles, require specific cutting patterns that generate more waste.
- Starter strips and ridge caps: Don’t forget to account for these specialized shingles needed for roof edges and ridges.
To calculate your materials with waste factor included, multiply your base square footage by your waste factor percentage (as a decimal), then add this to your base measurement. For example, if you need 24 squares and apply a 15% waste factor:
24 × 0.15 = 3.6 additional squares 24 + 3.6 = 27.6 squares needed
Always round up to the next whole number, so in this example, you would purchase 28 squares of shingles.
Digital Alternatives to Manual Measurement
Satellite Measurement Tools and Apps
Technology has revolutionized roof measuring with satellite-based tools that can save time and enhance safety by eliminating the need to climb onto your roof. Several smartphone apps and web-based services now offer roof measurement capabilities using satellite imagery.
These digital tools typically work by analyzing aerial photographs of your home, allowing you to outline your roof perimeter and automatically calculating the area, pitch, and even material quantities. Popular options include RoofSnap, EagleView, and Google Earth Pro, each offering varying levels of precision and features.
The advantages of digital measurement include:
- Safety: No need to climb ladders or walk on your roof
- Efficiency: Measurements can be completed in minutes rather than hours
- Visualization: Many tools provide 3D models of your roof for better project planning
- Accuracy: Advanced algorithms can provide measurements within 95-98% accuracy
However, these tools do have limitations. Very new construction may not appear in satellite imagery, and tree coverage can obscure roof details. For the most critical projects, commercial roof replacement specialists still recommend verifying digital measurements with at least some manual checks.
Some professional-grade measurement services charge a fee but provide detailed reports with all the measurements and calculations you need for your project. These can be particularly valuable for complex roofs where precision is critical.
When to Call a Professional Measurer
While DIY measurement is achievable for many homeowners, certain situations warrant professional assistance. Consider consulting experts from Veteran Brothers Roofing & Restoration.
Has extremely complex geometry with multiple intersecting planes Features unusual architectural elements that complicate measurement Is exceptionally steep (8/12 pitch or greater) or otherwise dangerous to access Has significant damage that makes walking on the surface unsafe Requires insurance documentation for storm damage claims
Professional measurers use specialized equipment including drones, laser measuring devices, and software that can provide extremely accurate calculations. They’re also trained to identify potential issues that might affect your roofing project.
The cost of professional measurement typically ranges from $200-$500 depending on roof complexity and size, but this investment can prevent costly errors in material ordering. Many roofing companies will apply this fee toward your project if you hire them for the installation.
For insurance claims, professional measurements are particularly valuable, as they provide documentation that meets insurance company standards and can help ensure you receive proper compensation for damaged areas.
If you’re uncertain about your ability to safely and accurately measure your roof, emergency roofing specialists can connect you with professionals who can help with this critical first step.
Cost Estimation Based on Your Measurements
Once you’ve determined your roof’s square footage and the number of squares needed, you can develop a reasonably accurate project budget. Shingle prices vary widely based on material quality, style, and manufacturer.
Basic three-tab asphalt shingles typically cost $70-$100 per square, while architectural shingles range from $100-$150 per square. Premium options like cedar shakes or metal shingles can cost $300-$500 or more per square.
Beyond shingles, your project budget should include:
- Underlayment: $40-$70 per square
- Ice and water shield (for vulnerable areas): $50-$100 per square
- Drip edge and flashing: $2-$4 per linear foot
- Ridge vent materials: $2-$3 per linear foot
- Nails and miscellaneous hardware: $25-$50 per square
- Removal and disposal of old roofing (if applicable): $100-$150 per square
For a complete 24-square roof replacement using mid-range architectural shingles, material costs might break down as follows:
- Shingles: 24 squares × $125 = $3,000
- Underlayment: 24 squares × $50 = $1,200
- Ice and water shield: 5 squares × $75 = $375
- Drip edge and flashing: $400
- Ridge vent and caps: $300
- Nails and hardware: $600
- Removal/disposal: 24 squares × $125 = $3,000
- Total materials estimate: $8,875
Remember that these are national averages, and prices vary by region. In areas served by roofing contractors in Euless TX, material costs may differ based on local market conditions and transportation costs.
Common Measurement Mistakes and How to Avoid Them
Even experienced DIYers make measurement errors that can impact their roofing projects. Being aware of these common mistakes can help you avoid them:
- Measuring from the ground instead of the roof surface: This ignores the actual area created by your roof’s pitch. Always measure the surface area or apply the appropriate pitch multiplier.
- Forgetting about waste factors: Failing to account for waste can leave you short on materials. Always add 10-20% depending on roof complexity.
- Overlooking roof penetrations: Chimneys, vents, and skylights affect your shingle requirements and installation approach. Measure and account for these features carefully.
- Miscalculating ridge and hip lengths: These areas require special cap shingles. Measure all ridges and hips separately and accurately.
- Using horizontal measurements for valleys: Valleys create additional surface area that must be measured along the valley line, not horizontally.
- Ignoring starter strips and ridge caps in material calculations: These specialized shingles are essential but often forgotten in material estimates.
- Assuming all shingles cover the same area: Different shingle types and brands may cover different areas per bundle. Always check manufacturer specifications.
To ensure accuracy, double-check all measurements and calculations before ordering materials. Consider having a second person verify your numbers, especially for complex roofs. Roofing contractors in Grapevine TX recommend creating a detailed diagram of your roof with all measurements clearly labeled to help organize your calculations.
Start Your DIY Project With Accurate Roof Measurements Today
Taking the time to accurately measure your roof is the crucial first step toward a successful DIY roofing project. With the right tools, techniques, and attention to detail, you can confidently determine exactly how much material you’ll need, avoiding costly overages or frustrating shortages.
Remember that precision in this initial phase pays dividends throughout your project. Accurate measurements lead to better budgeting, smoother installation, and ultimately, a roof that protects your home for years to come. If at any point you feel uncertain about your measurements or the scope of your project, don’t hesitate to consult with Veteran Brothers Roofing & Restoration. Our experienced team can provide guidance, verification, or complete roofing services to ensure your home is protected with quality craftsmanship.
Ready to take the next step? Gather your measuring tools, follow the systematic approach outlined in this guide, and begin your roofing project with confidence. Your well-measured roof will be the foundation for a successful DIY shingle installation that enhances both the protection and value of your home.
Frequently Asked Questions
How accurate do my roof measurements need to be?
Your measurements should be as accurate as possible, ideally within 2-3% of the actual dimensions. Even small measurement errors can compound when calculating total roof area, potentially leading to significant material shortages or overages.
For a typical 2,000 square foot roof, aim for measurements accurate within 40-60 square feet. If you’re uncertain about your measurements, consider having them verified by a professional residential roof repair service provider before ordering materials.
Can I measure my roof without climbing on it?
Yes, you can estimate your roof measurements from the ground by measuring your home’s footprint and applying pitch multipliers. However, ground-based measurements are less accurate than those taken directly on the roof surface. Alternative methods include using satellite measurement apps or hiring professionals with drone technology. If safety is a concern due to roof steepness or height, these alternative methods are strongly recommended over attempting to climb on the roof yourself.
How do I account for waste when ordering shingles?
Industry standards recommend adding 10-15% waste factor for simple roofs and 15-20% for complex roofs with multiple valleys, dormers, or cut areas. To calculate, multiply your total square footage by the appropriate waste percentage (as a decimal) and add this to your base measurement. For example, a 2,000 square foot roof with 15% waste would require materials for 2,300 square feet (2,000 × 0.15 = 300; 2,000 + 300 = 2,300). Always round up to the nearest bundle when ordering materials.
What’s the difference between measuring for 3-tab shingles versus architectural shingles?
The measurement process is identical for both shingle types, but the conversion to bundles may differ. Traditional 3-tab shingles typically come in bundles that cover 33.3 square feet each (3 bundles per square), while some architectural shingles may cover less area per bundle due to their thickness and weight (sometimes requiring 4-5 bundles per square). Always check the manufacturer’s specifications for the exact coverage per bundle for your chosen shingle type and adjust your order accordingly.
How do I measure a roof with multiple levels or additions?
For homes with additions or multiple roof levels, measure each section separately and then add them together for your total. Create a simple diagram dividing your roof into manageable sections, typically rectangles, triangles, or trapezoids. Calculate the area of each section independently, accounting for different pitches if necessary.
This sectional approach is recommended by roofing contractors in Southlake TX as it minimizes the chance of measurement errors on complex structures and ensures all areas are properly accounted for in your material calculations.
About Veteran Brothers Roofing & Restoration
Veteran Brothers Roofing & Restoration is a premier roofing company serving the Dallas-Fort Worth metroplex, including Arlington, Bedford, Dallas, Euless, Grapevine, Keller, North Richland Hills, and Southlake. Founded by military veterans, our company brings military precision and attention to detail to every roofing project. We specialize in residential and commercial roofing services, including roof repairs, replacements, inspections, and emergency services. Our team is committed to delivering exceptional craftsmanship, transparent pricing, and outstanding customer service on every project.
INCOMING MESSAGE
It’s storm season. If you think there’s been storm damage to your roof, or would simply like the peace of mind of knowing you’re in the clear, Veteran Brothers is here to help.
